
Last Updated on August 11, 2024
When Google launched the AMP project in October 2015, there was a lot of confusion among website owners and publishers. While AMP promised faster pages and improved user experience, it demanded radical changes in the optimization section to make web pages faster for mobile devices.
Nowadays, we spend a lot of time on mobiles, so businesses are developing the latest ways of monetizing. Just like Facebook introduced Instant Articles and Apple brought out Apple News, Google has rolled out Google AMP.
Like any other Google project, the AMP project found large early adopters, but most developers remained skeptical. We too did a detailed study on how to get started with Google AMP.
It’s 2024, and AMP is still here.
So, is it advisable to create an AMP version of your website?
Google has shifted its focus from the AMP versions of pages to Core Web Vitals. In this article, we explore Google what it is, how it works, and its relevance in 2024.

What is Accelerated Mobile Pages (AMP)?
AMP or Accelerated Mobile Pages is a Google-backed project that aims to speed up the content delivery system by using stripped-down code, i.e., the AMP HTML. In simple words, AMP is the way to create web pages for static content and allows pages to load faster than regular HTML.
AMP uses an open-source framework, meaning other companies can use it to serve content built using AMP HTML, such as Twitter, Google, and Pinterest. Google will now use these accelerated mobile pages to serve the content on mobile devices without users needing to click through to the website to check the content. You can easily view the demo of AMP within Google’s search results.
How does AMP for Google work?
At the core, Google AMP creates lightweight versions of web pages using a restricted subset of HTML, CSS, and JavaScript.
When you set up AMP for your web pages, your tool or plugin will use a custom AMP HTML markup with specific tags and restrictions. Additionally, AMP pages prohibit custom JavaScript. Only asynchronous JS from AMP libraries is allowed. Such pages cannot use any external stylesheets except custom fonts. Additionally, AMP versions of webpages have inline and size-bound (50KB limit) CSS files.
Google creates an AMP cache for valid AMP pages and then serves validated AMP pages from its own CDN for faster delivery.
Browsers can preload AMP content on the front before users click, enabling instant loading.
AMP provides built-in components for standard features like carousels and lightboxes, enabling more interactive content.
AMP pages must pass validation to be discoverable and eligible for AMP Cache. You can check the validity of the pages for AMP using this Google AMP Test tool.
This architecture ensures fast loading, smooth scrolling, and prioritized content delivery on mobile devices.
Why use AMP?
AMP basically aims to solve the problem of slow loading time. Using the AMP elements, Google believes that the websites can drive this down from a whooping 19 seconds to just 5 seconds or 400 percent improvement in performance. Indeed, AMP’s optimization techniques will help the pages to load instantly.
Well, AMP makes it very easy for publishers and advertisers to offer resource-intensive content like image carousels, plugins, and video by reducing the total bandwidth required to deliver this kind of content.
Limitations AMP introduces in web design:
AMP HTML is specially made to improve the content’s readability and speed. Thus, there are a few visual limitations, including:
Images will load just as you scroll down to those
No JavaScript allowed apart from the AMP library
CSS version required
While these limitations can be easy for developers to overcome, for content creators using CMSes like WordPress, it raises multiple challenges. Fortunately, there are plugins available that allow WordPress users to instantly create AMP versions of their websites without technical know-how.
So, do you want to have Google AMP on your WordPress?
How do you include AMP in your WordPress site?
Before you proceed, it is essential to be aware that AMP may not be the perfect way to make your WordPress site load faster on mobile devices anymore. Focusing on Core Web Vitals is a better alternative to provide a better experience to mobile users and improve traffic to a great extent.
If you choose to go for AMP for your WordPress site, here are the steps to follow:
Step By Step Tutorial to Make Your WordPress Blog AMP Ready
First you Need to Install AMP WordPress Plugin – Link or just to to Add New Plugin In Your WordPress Plugins Section & Search AMP to Install AMP Plugin.
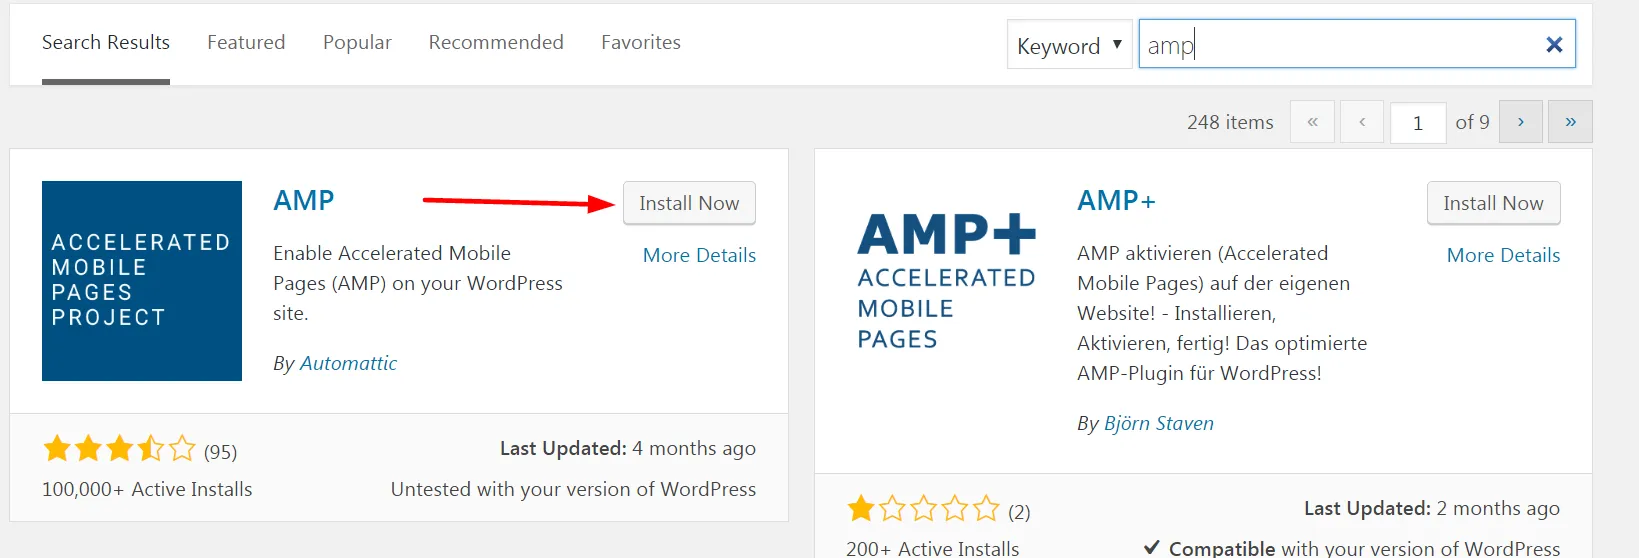
This is main AMP Plugin but after installing this your site is AMP Ready but this plugin don’t do much with designing of AMP Pages which you would surely like to consider, so to customize your AMP Site, add logo, ads, menu & many more options you need to Install Another Plugin AMP for WP ( Link ) or Search Accelerated Mobile Pages or AMP for WP in Plugin Search to Install Plugin.

Setting Options -AMP for WP

To go to Settings Page, Look at the Options Available on your WP Dashboard Menu, You will find an option of AMP at bottom of Dashboard Links. Once You Click on AMP, AMP Settings Page will look like this
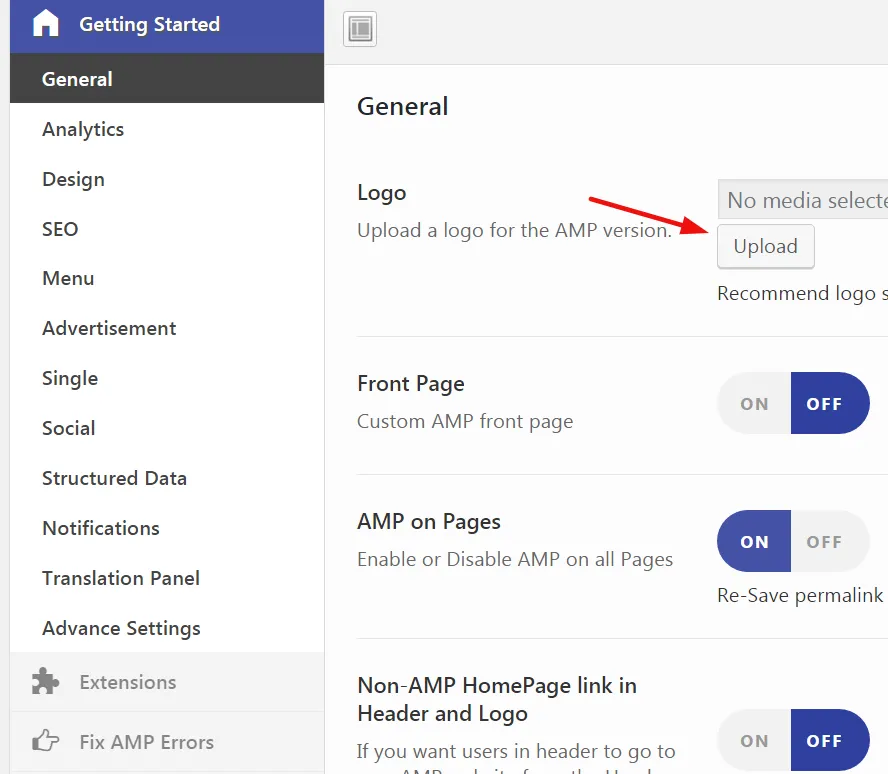
Settings Page Will have Following Options :
General – Her you can upload Logo for AMP site, choose a custom Home Page for AMP site & Some other options.
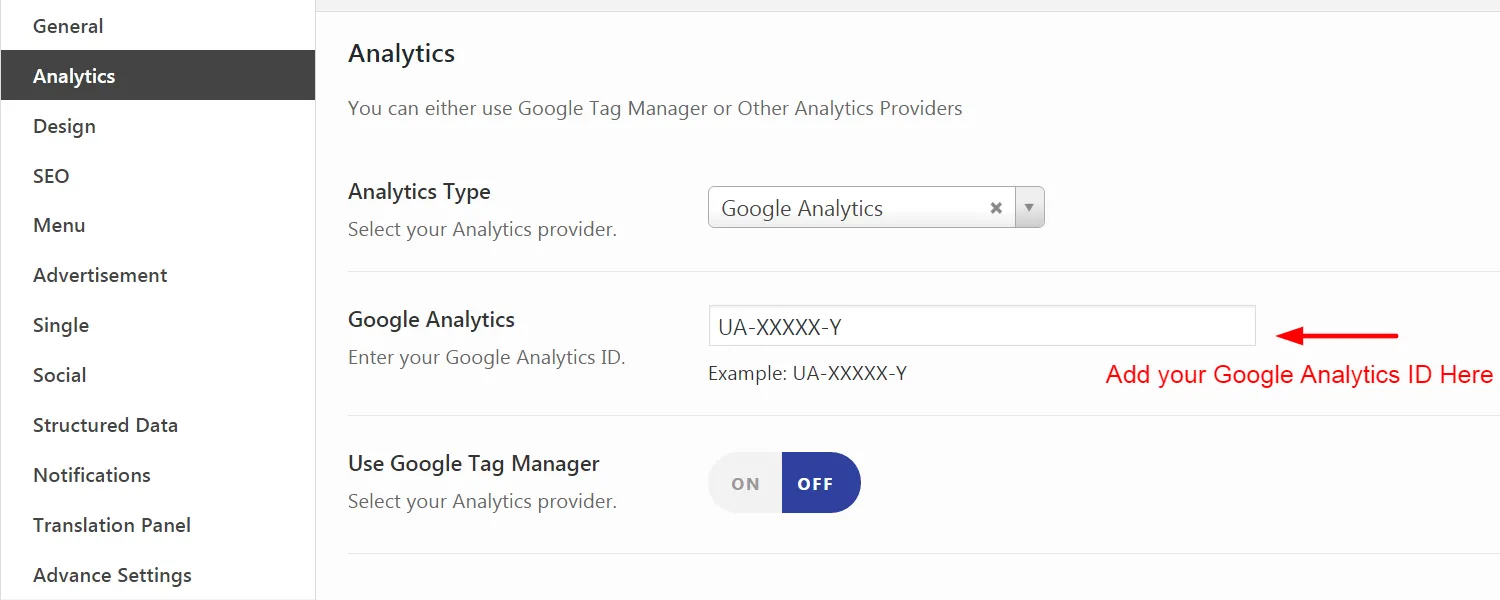
Analytics – Here You can add Your Google Analytic ID to track the visitors of your website
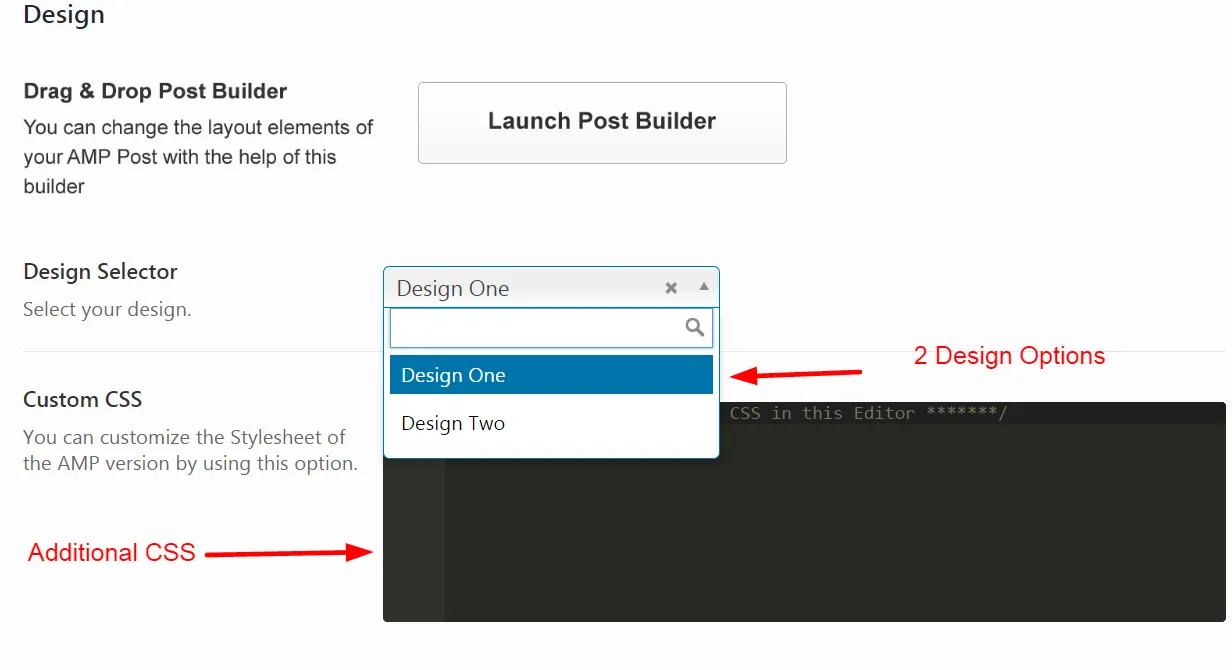
Design – In Design Option You can choose from 2 Design Templates, there is 1 more option for adding additional CSS for custom designing.
SEO Settings – In this section you can select options like Keeping SEO Meta Data from Yoast SEO Plugin, Custom Description in Yoast for AMP & Additional Header Tags.

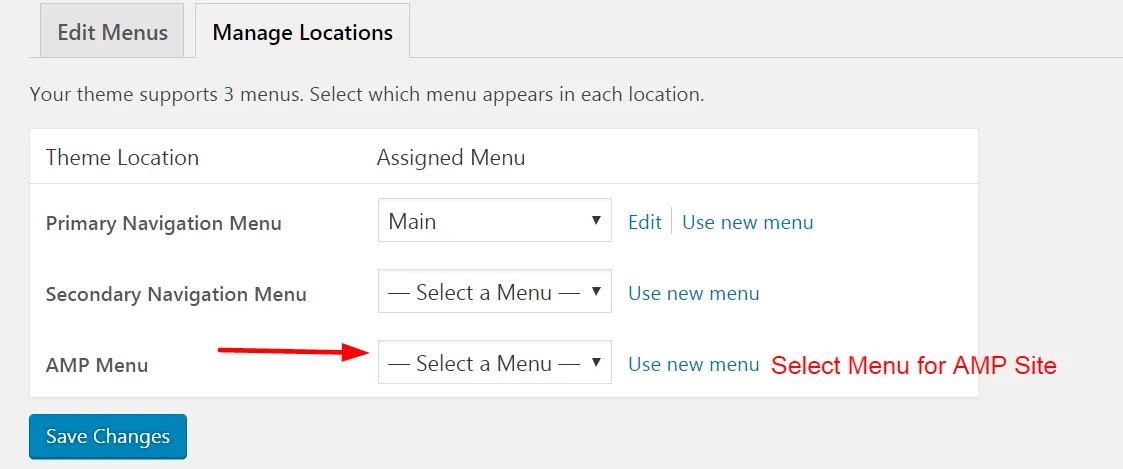
Menu – Here you can Click on the Link & Select a Menu for AMP Site, You can select from Previous Menus or you can create a menu for AMP Site.
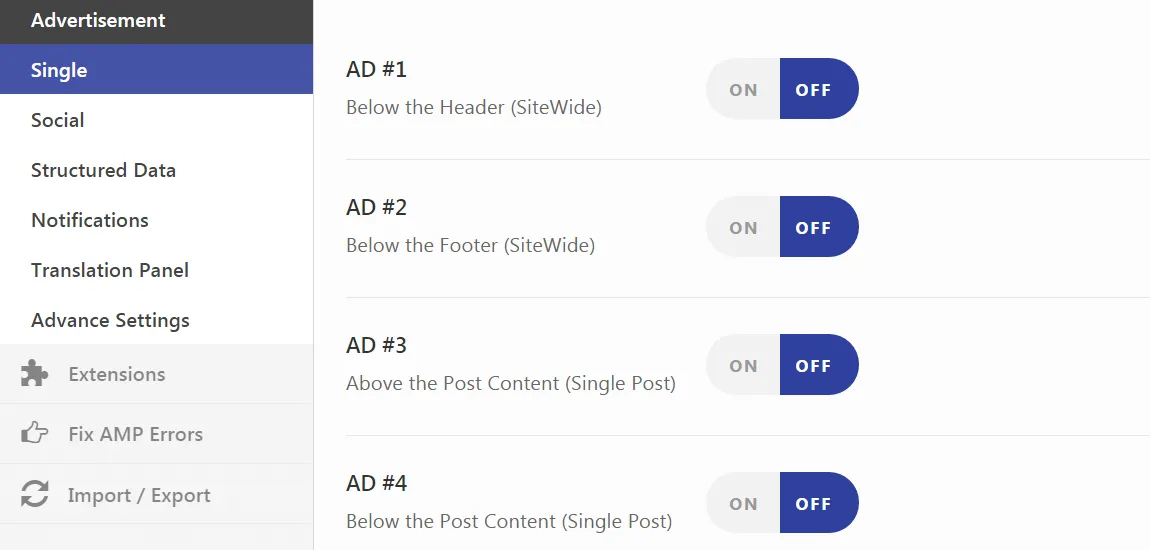
Advertising – In This section you can add Google Adsense on different parts of your posts & pages by inserting Publisher IDs & Ad IDs.
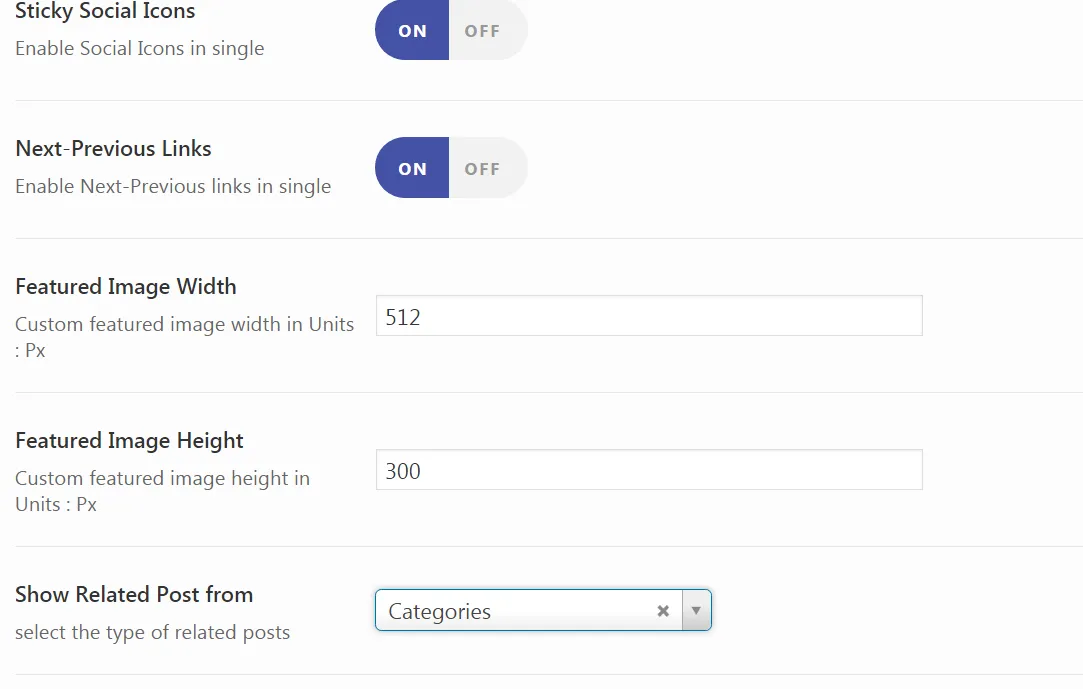
Single Post Settings – There are some options like Social Media Icons for Single Posts, Display Next & Previous Posts on main page, selecting size of featured image etc.
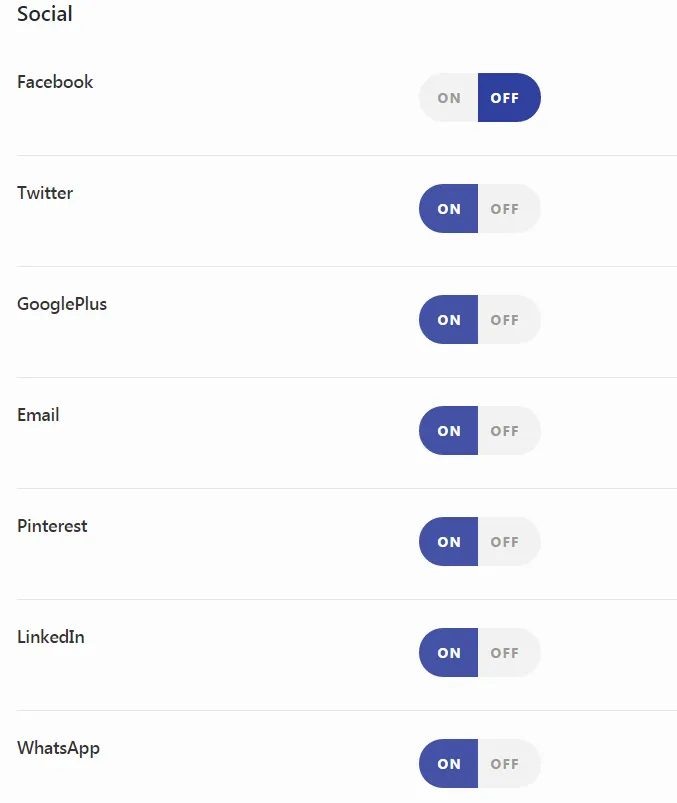
Social Sharing :- In social sharing Settings you can choose which social sharing options you need for your posts.
There are some more setting options for settings related to Structure Data, Notifications & translation, You can choose as per your requirements.
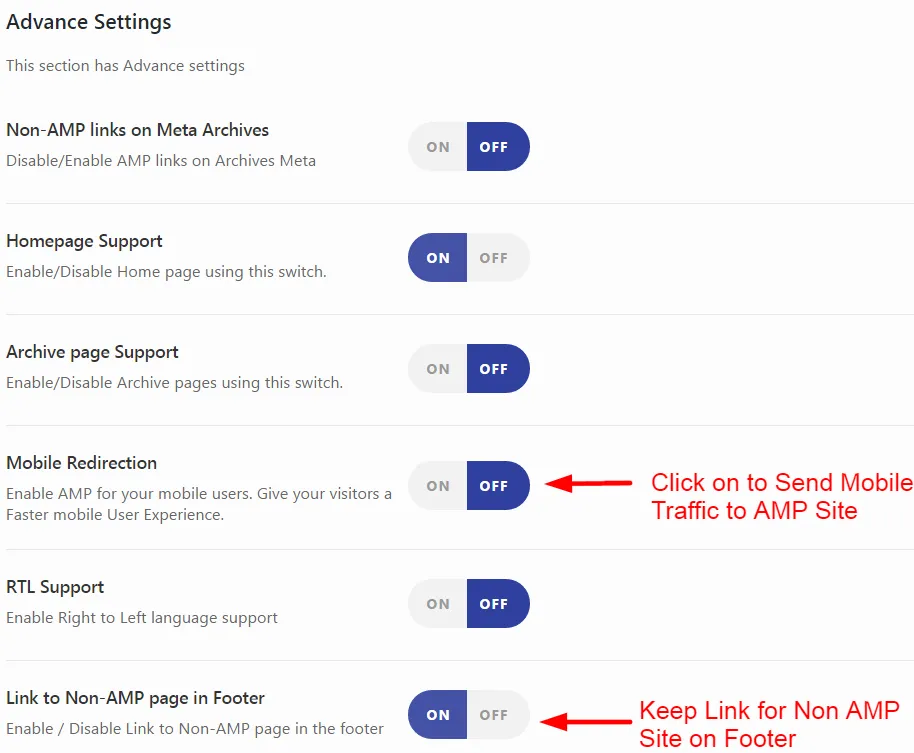
To Display AMP version of website when visited from Mobile turn on the mobile redirection. You can also display link to normal version at last by checking Link to Non-AMP page on Footer option.
Your WordPress site is now AMP-ready. On average, you can expect pages to load about four times faster than standard web pages on mobile if your AMP setup is correct.
Now, moving ahead, let’s take a look at the main pros and cons of AMP here:
AMP Pros and Cons
Pros at a glance
- As AMP is open source, by loading the web pages faster, you may see SEO benefits because speed serves to be a significant ranking component in SERPs
- It is possible to get a carousel in mobile SERPs
- There is a WordPress plugin that you can expect to pop up for Joomla, Drupal, and Magento.
- As this is a Google project, you can assume that the AMP pages will be its own ranking factor.
- The AMP HTML prevents the users from bloating the web pages with JS and CSS frameworks.
- There are many customization and control options, like the chance to not use the AMP cache.
Cons
- It may be tough to implement these pages if you are not an avid developer
- Some features are missing, but they may be added later
- It introduces complexity to some extent
How AMP benefits websites – What does Google have to say?
Google states that there are mainly three areas of benefit if you adopt AMP, including:
Content- AMP makes it simpler for publishers and developers to deliver resource-intensive content like image carousels, videos, and plugins
Ad delivery- At the heart of AMP is the aim to protect Google’s cash cow advertising franchise. Google aims to grow $80 billion in ad revenue annually. AMP was introduced to work with different ad formats, networks, etc.
Distribution- By making the AMP cache available, the massive universal footprint of the data center will save as well as deliver web pages with high efficiency. Imagine Akamai for the publishers. It even extends Google’s hold over content, similar to instant articles by Facebook.
Further, if readers are coming to your website mainly to read the content from your site’s news or blog section, then it is a sure-shot chance for you to get started with Google’s mobile results through the creation of AMP of your content.
For example, there are three sites on How-to guides covering the same topic, and there is just one site from those that serves the AMP version of the content. In such a case, the site with the AMP version will definitely appear above in the regular results and searches.
Is AMP still a thing in 2024?
The simple answer would be NO.
But there is more to the AMP project.
One of the reasons most developers do not believe in the AMP project is that Google was under fire, and publishers made accusations that Google was slowing down non-AMP versions of web pages to force publishers to pay more for advertising. A lawsuit regarding the same was filed on October 21, 2021, against Google.
A couple of years ago, Google AMP pages appeared in the search results, but that’s not the case anymore.
We recommend publishers and webmasters focus on Core Web Vitals rather than AMP.
AMP Alternative in 2024
Progressive Web Apps (PWAs) have emerged as a potential alternative to Google AMP to optimize the web experience for mobile users. Unlike AMP, which focuses primarily on optimizing page load speed and performance, PWAs aim to deliver a more app-like experience to users directly through the web browser.
Here’s a concise table comparing AMP and PWAs based on the provided information:
| Aspect | AMP | PWA |
| User Experience | Fast loading, limited design flexibility | Rich features, app-like experience, offline access |
| Performance | Optimized for quick initial load | Fast and reliable, even in poor network conditions |
| Flexibility | Restricted by AMP guidelines | Highly customizable and interactive |
| SEO Impact | Direct boost in search visibility | Variable impact, depends on implementation |
| Key Features | Simplified HTML, streamlined CSS | Service workers, push notifications, installable |
| Content Type | Ideal for static, content-heavy pages | Suited for dynamic, interactive applications |
| Caching | Uses Google AMP Cache | Utilizes service workers for caching |
| Platform Support | Consistent across devices | Can leverage device-specific capabilities |
| User Retention | Focuses on reducing bounce rates | Enhances engagement and repeat visits |
| Development Approach | Strict guidelines, limited JavaScript | Flexible, uses standard web technologies |
This table highlights the key differences between AMPs and PWAs across various aspects, highlighting their strengths and use cases.
Conclusion
Whether AMP remains relevant in 2024 is nuanced and multifaceted. Introduced as a solution to enhance the mobile user experience by significantly speeding up page load times, it gained early adoption from major platforms, but soon, criticisms and challenges followed.
Developers argue that Google AMP restricts design flexibility and imposes dependencies on Google’s ecosystem. This potentially compromises user experience and inclusivity as Google control issues worry developers and brands.
Today, Core Web Vital offers an alternative to AMP pages to adapt to changing technological stacks and address concerns regarding flexibility and inclusivity.